The system provides for an unlimited number of customer advances.
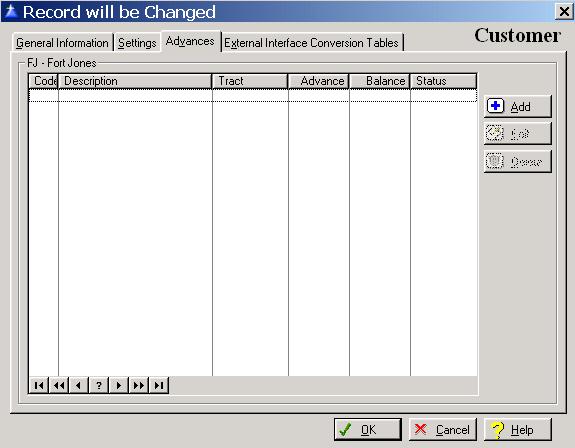
To access the Customer Advance tab, click on the Advances tab, or press “Alt V”.
The Customer Advance list window, will be displayed as follows:
Customer Advance Maintenance
To add a new customer advance, click on the Add button, press “Alt A”, or press the Insert key.
To edit an existing advance, highlight the advance and click on the Edit button, press “Alt E”, or press Enter.
To delete an advance, highlight the advance and click on the Delete button, press “Alt D”, or press the Delete key.
When you add a new advance, the system will display the Customer Advance Information window as follows:

Enter or edit the information on the Customer Advances Information window according the following specifications:
Advance Code
The code is a two-character field used to identify the advance within the system. The system does allow the use of duplicate advance codes.
Advance Description
Enter up to thirty-characters to describe the advance. An entry in this field is required
W/H Method
Enter the withholding method for the customer’s advance. To display a selection list of the valid withholding methods, click on the drop-down box arrow. The two withholding methods and a description of each method is shown below:
Unit of Measure – The advance deduction will be calculated based on the unit of measure regardless of the product.
Product/Unit – The advance deduction will be calculated based on a specific product and the unit of measure.
Source
Enter the source that the advance is assigned. For example, if a mill advanced you $50,000.00 to deliver a certain product to their mill of the Jones tract, you would enter “Jones”. To display a selection list of the valid sources, press Enter, or click on the Lookup button.
Destination
If the customer advance is specific to a destination (delivery point), enter the destination. An entry in this field is optional. If no destination is entered, then the advance would apply to all destination assigned to the customer. To display a selection list of the valid destinations, press Enter, or click on the Lookup button.
Advance Amount
Enter the amount of the advance. The field allows for eight digits with two decimal positions.
Advance Date
Enter the date of the customer advance. An entry in this field is required.
Advance Balance
The advance balance field is maintained by the system.
To save and exit the Advance Information window, press Page Down, click on the OK button, or press “Alt O”. To exit without saving the Advance Information window, click on the Cancel button, press “Alt C”, press Esc, or click on the “X” in the upper right corner of the screen.
Per Unit Rates Box
To access the Customer Advance Per Unit Rates window, click on the Per Unit Rates box. The system will display the Per Units Rate List window as follows:
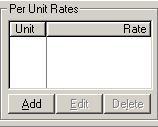
To add a new per unit rate, click on the Add button, press “Alt A”, or press the Insert key.
To edit an existing per unit rate, highlight the per unit rate record, and click on the Edit button, press “Alt E”, or press Enter.
To delete an existing per unit rate, highlight the per unit rate record, and click on the Delete button, press “Alt D”, or press the Delete key.
The system will display the per unit rates window as follows:
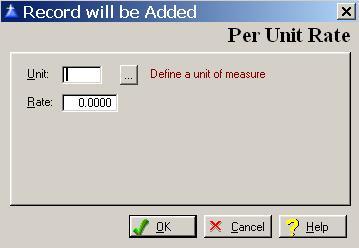
Enter or edit the information on the Per Unit Rate window according the following specifications:
Unit of Measure
Enter the unit of measure for the advance deduction. To display a selection list of the valid units of measure defined within the system, press Enter, or click on the Lookup button. The system defaults to displaying only the active units of measure on the selection list.
Unit Rate
Enter the advance deduction rate for the product unit of measure.
To save and exit the Per Unit Rate, press Page Down, click on the OK button, or press “Alt O”. To exit without saving the Per Unit Rate window, click on the Cancel button, press “Alt C”, press Esc, or click on the “X” in the upper right corner of the screen.
Product Unit Rates Box
To access the Customer Advance Product Unit Rates window, click on the Product Unit Rates box, or press “Alt O”.
The system will display the Per Units Rate List window as follows:
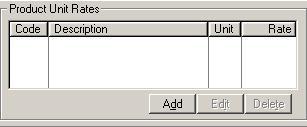
To add a new product unit rate, click on the Add button, press “Alt D”, or press the Insert key.
To edit an existing product unit rate, highlight the product unit rate and click on the Edit button, press “Alt I”, or press Enter.
To delete an existing product unit rate, highlight the product unit rate and click on the Delete button, press “Alt T”, or press the Delete key.
The system will display the Product Unit Rates window as follows:
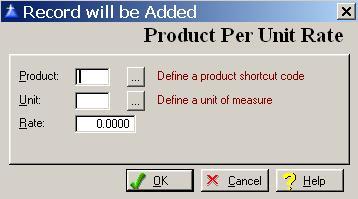
Enter or edit the information on the Product Unit Rate window according the following specifications:
Product
An entry in this field is required. To display a selection list of the valid products defined within the system, press Enter, or click on the Lookup button. The system defaults to displaying only the active products on the selection list.
Product Deduction Unit of Measure
Enter the product unit of measure for the deduction. To display a selection list of the valid Units of Measure defined within the system, press Enter, or click on the Lookup button. The system defaults to displaying only the active units of measure on the selection list.
Product Unit Rate
Enter the deduction rate for the product unit of measure.
To save and exit the Product Unit Rates window, press Page Down, click on the OK button, or press “Alt O”. To exit without saving the Product Unit Rates window, click on the Cancel button, press “Alt C”, press Esc, or click on the “X” in the upper right corner of the screen.
Settings Box
Stop At Zero Balance
Enter a check in the box if you want to stop the deduction when a zero balance is reached. If you not want the stop the deduction once a zero balance is reached, leave the box unchecked. To place a check in the box, click on the Stop At Zero Balance box, or press the Space Bar when the selection box is positioned over the Stop At Zero Balance field.
Status
Select the active box if the advance is active, or select the inactive box if the advance is not active.
History Tab
The History tab displays all the history transactions for the advance.
To access the Customer Advance History window, click on the History tab, or press “Alt S”.
The system will display the Customer Advance History window as follows:

To save and exit the Advance window, press Page Down, click on the OK button, or press “Alt O”. To exit without saving the Advance window, click on the Cancel button, press “Alt C”, press Esc, or click on the “X” in the upper right corner of the screen.